Tutorial by Brett Leeper, 2014.
Scope
This tutorial teaches the reader the methods by which equirectangular panorama images and animations can be prepared from 2D material in Photoshop or 3D material in LightWave itself. Additionally shown is how to implement equirectangular panoramas, both still and animated, into LightWave as a source of animation themselves. This page features text and animated GIF images. The tutorial was written while using Photoshop CS6 and LightWave 11.5 in a Windows 8 environment.
Outcomes
Exported panorama images have uses in flash-based and browser-based panorama viewers, however the techniques of such end-game implementation is beyond the instruction of the tutorial. The value of applying 2D assets in LightWave is gaining a realistic 3D perspective. Recursively placing rendered 3D assets back into LightWave has not very many uses, but here are a couple: 1) You have rendering time available now but want to be able to decide your camerawork later. 2) Certain material effects, namely subsurface scattering, only calculates objects that are within the camera’s field of view, it doesn’t matter if they are nearby in the scene. If this affects your scene’s illumination, say the glow inside a wax candle should subtly illuminate another object, then rendering the entire scene in one camera shot ensures all objects are calculated, and then you can create your regularly-scheduled, targeted camerawork.



Background on Equirectangular Panoramas
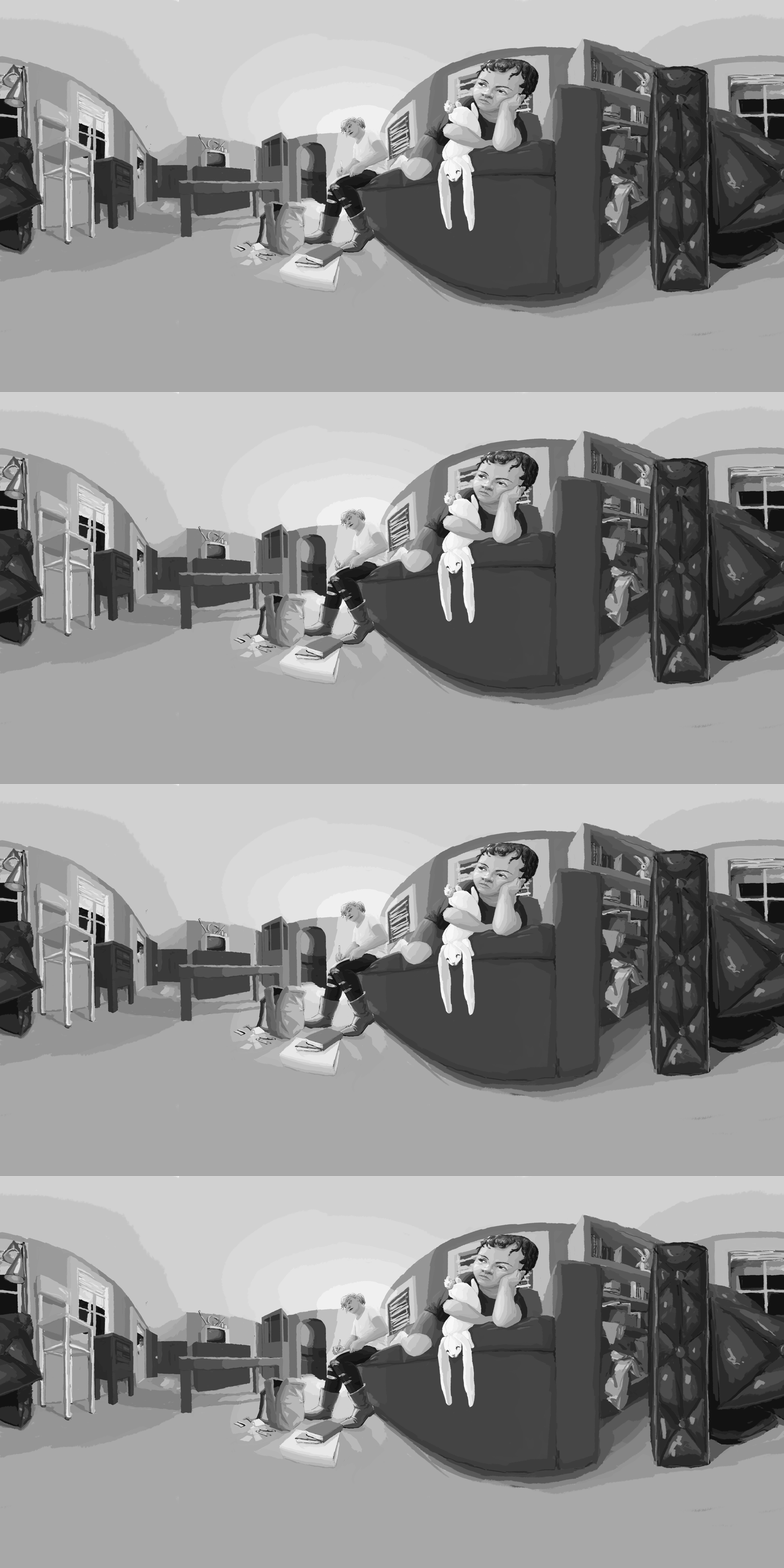
An equirectangular panorama is an image having a proportion of 2 lengths per 1 height which, projected onto a spherical space and having a rendering camera applied to it, creates the illusion of an immersive 360 environment the camera can rotate inside and zoom in or out of. Picture if you will Google Maps Street View, or their affiliated Photosphere and Views services. They are fairly trendy in photography, but have uses in architectural renderings. In animation where it serves as a backdrop on a distant encompassing sphere, you’ll sometimes hear it called a “world map.”
Perspective Properties of an Equirectangular Panorama
Picture a rectangular, flattened map of Earth. Lines of lattitude run left-to-right as they encircle the globe. Lines of longitude, though they converge at the poles, are represented as vertical lines. So is it with this equirectangular projection..Properly oriented, a panorama has the horizon level at the vertical center of the image. because the spherical projection handles the convergence of vertical perspective, vertical lines are painted vertically, whereas horizontal bands won’t be converged, thus they must entail their own perspective convergence as they curve around the sphere, arcing towards the horizon. On a map of airline flights (or ballistic missile paths if that gives you the right mental image), the direct over-surface route between two places on the earth’s surface is rendered as a curve, and this is known as a great line.
Exporting a Panorama from Photoshop
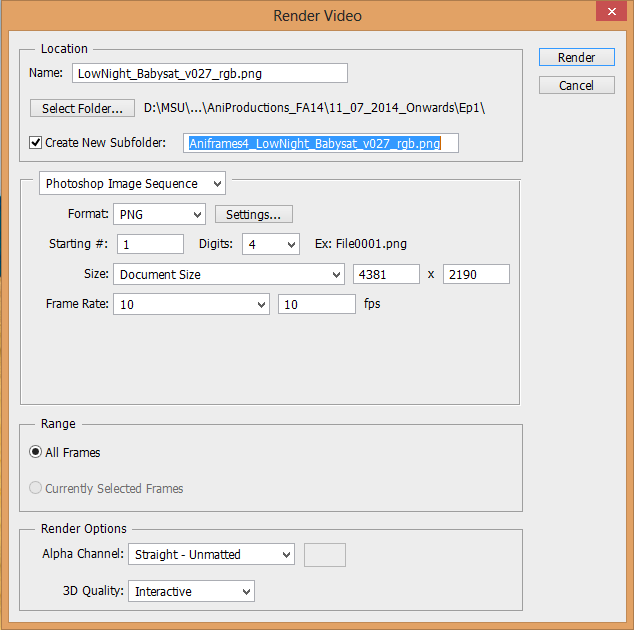
When working with a still, the Save As function will do nicely. When working with a Photoshop animation, frames could be manually exported if you really wanted to but it is rather convenient to use the Render Video function. Go to File>>Export>>RenderVideo…

From here the video export settings are as follows. Make sure your folder location and file name will let you find your video or image sequence later. When using an image sequence, your frame number will be less confusing when it’s not directly following an existing version number. Make sure the frame rate is what you need. Lightwave can handle whatever frame rate you specify so if an animation is 10 frames per second, there is no need to export it at 30 fps, that’s just a waste of storage space. Lightwave can handle some video formats and also does well with image sequences.
Additionally, doublecheck that your alpha export settings are what you need. If you are layering components, say you have a still background that you want to layer a figure animation on top of, you can save space by layering them directly in LightWave rather than rendering out the entire background for image sequence.
Photoshop’s video export unfortunately has a limit of 5000×2500 pixels, so any larger images will need to be exported either manually or using another method.
Exporting Panoramas from LightWave
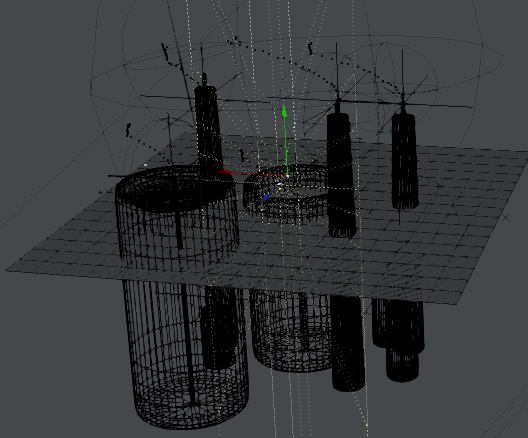
under the Camera Properties tab in the Render Globals window (also Camera Properties beneath the viewports) LightWave’s Advanced Camera has settings which can render equirectangular images. With the camera type set to Advanced Camera, and the width and height set to a frame aspect ratio of 2, select the properties button next to Advanced Camera. from here the Horizonal FoV selection must be set to Cylinder, at 360 degrees. the Vertical FoV should be set to Same as horizontal. Now you’re good to go.
For this asset export it is important to keep the camera in a level orientation without any rotations if you want to have a sensible control of the camera later, else orienting your later scene’s camera against an already moving camera orientation is absurd for many applications.
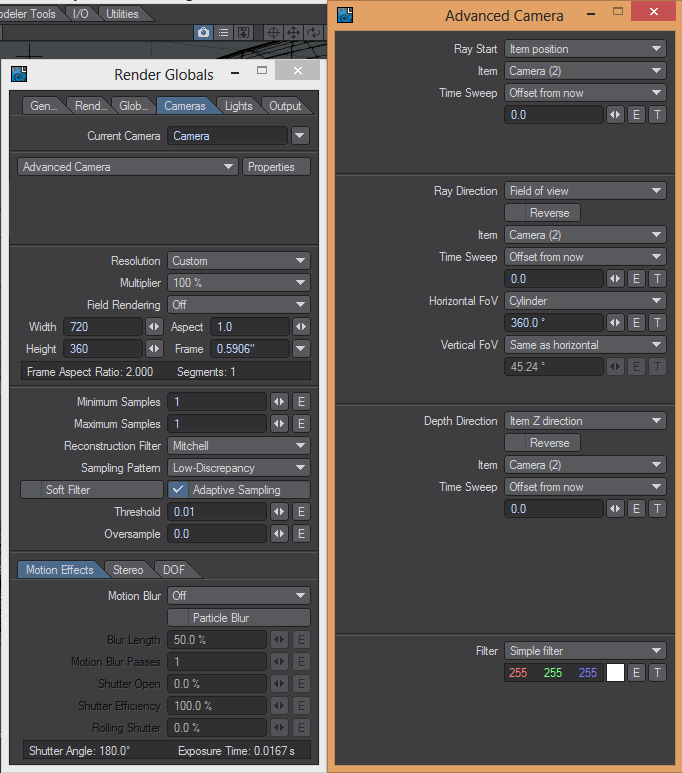
Placing Panorama Assets into LightWave
We will be importing the assets we just created into the scene’s backdrop. First, click-drag the corner of your Camera View viewport to adjust it to match the camera’s rendering frame aspect ratio, and then select VPR from the viewport style dropdown selection list so that you will actually see your new backdrop once it’s loaded in.

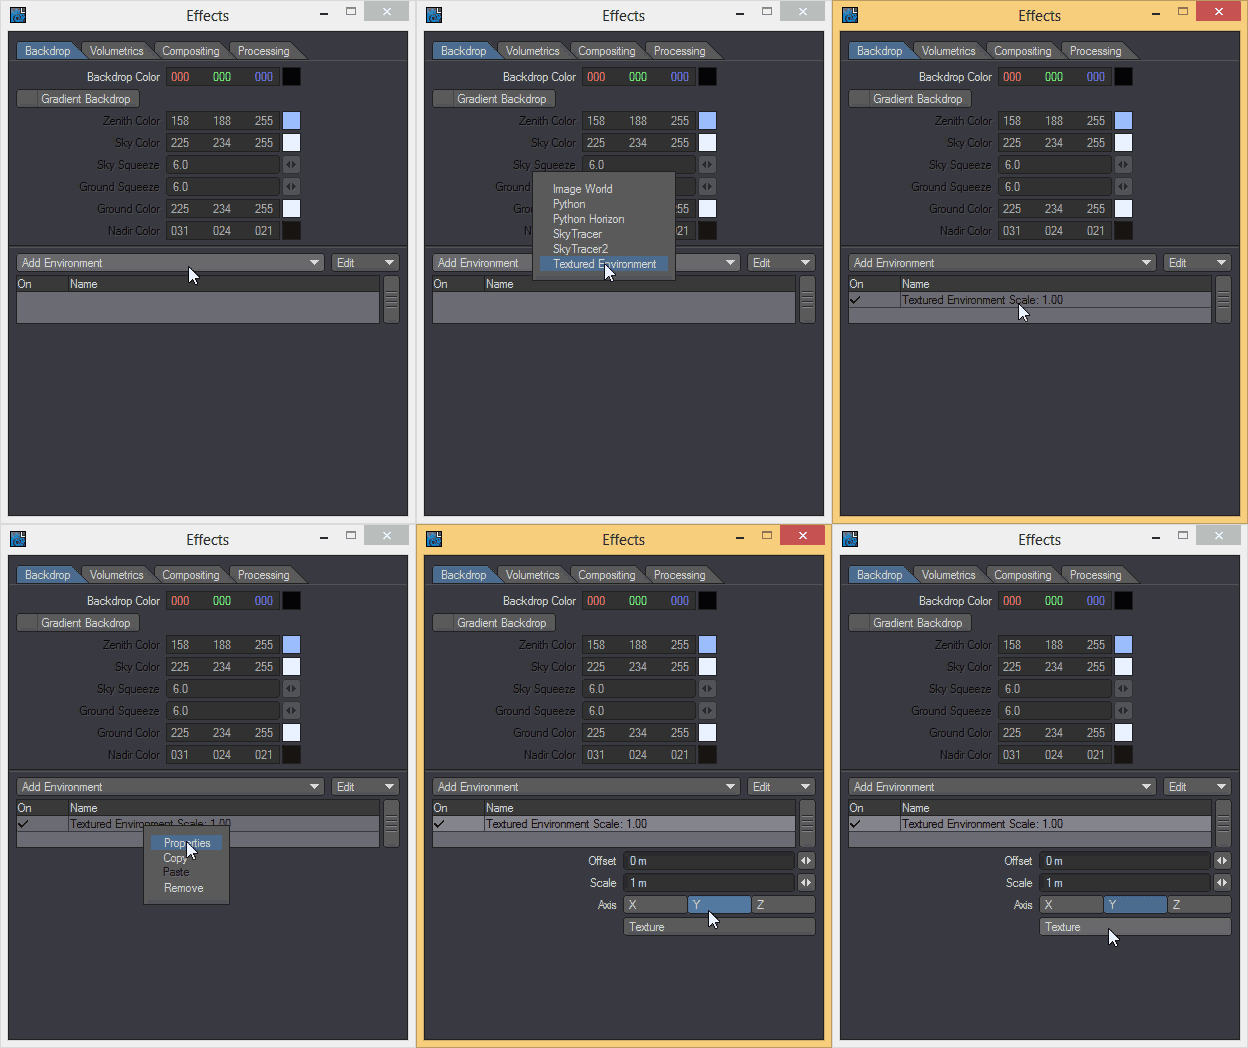
Go to Windows>>BackdropOptions…

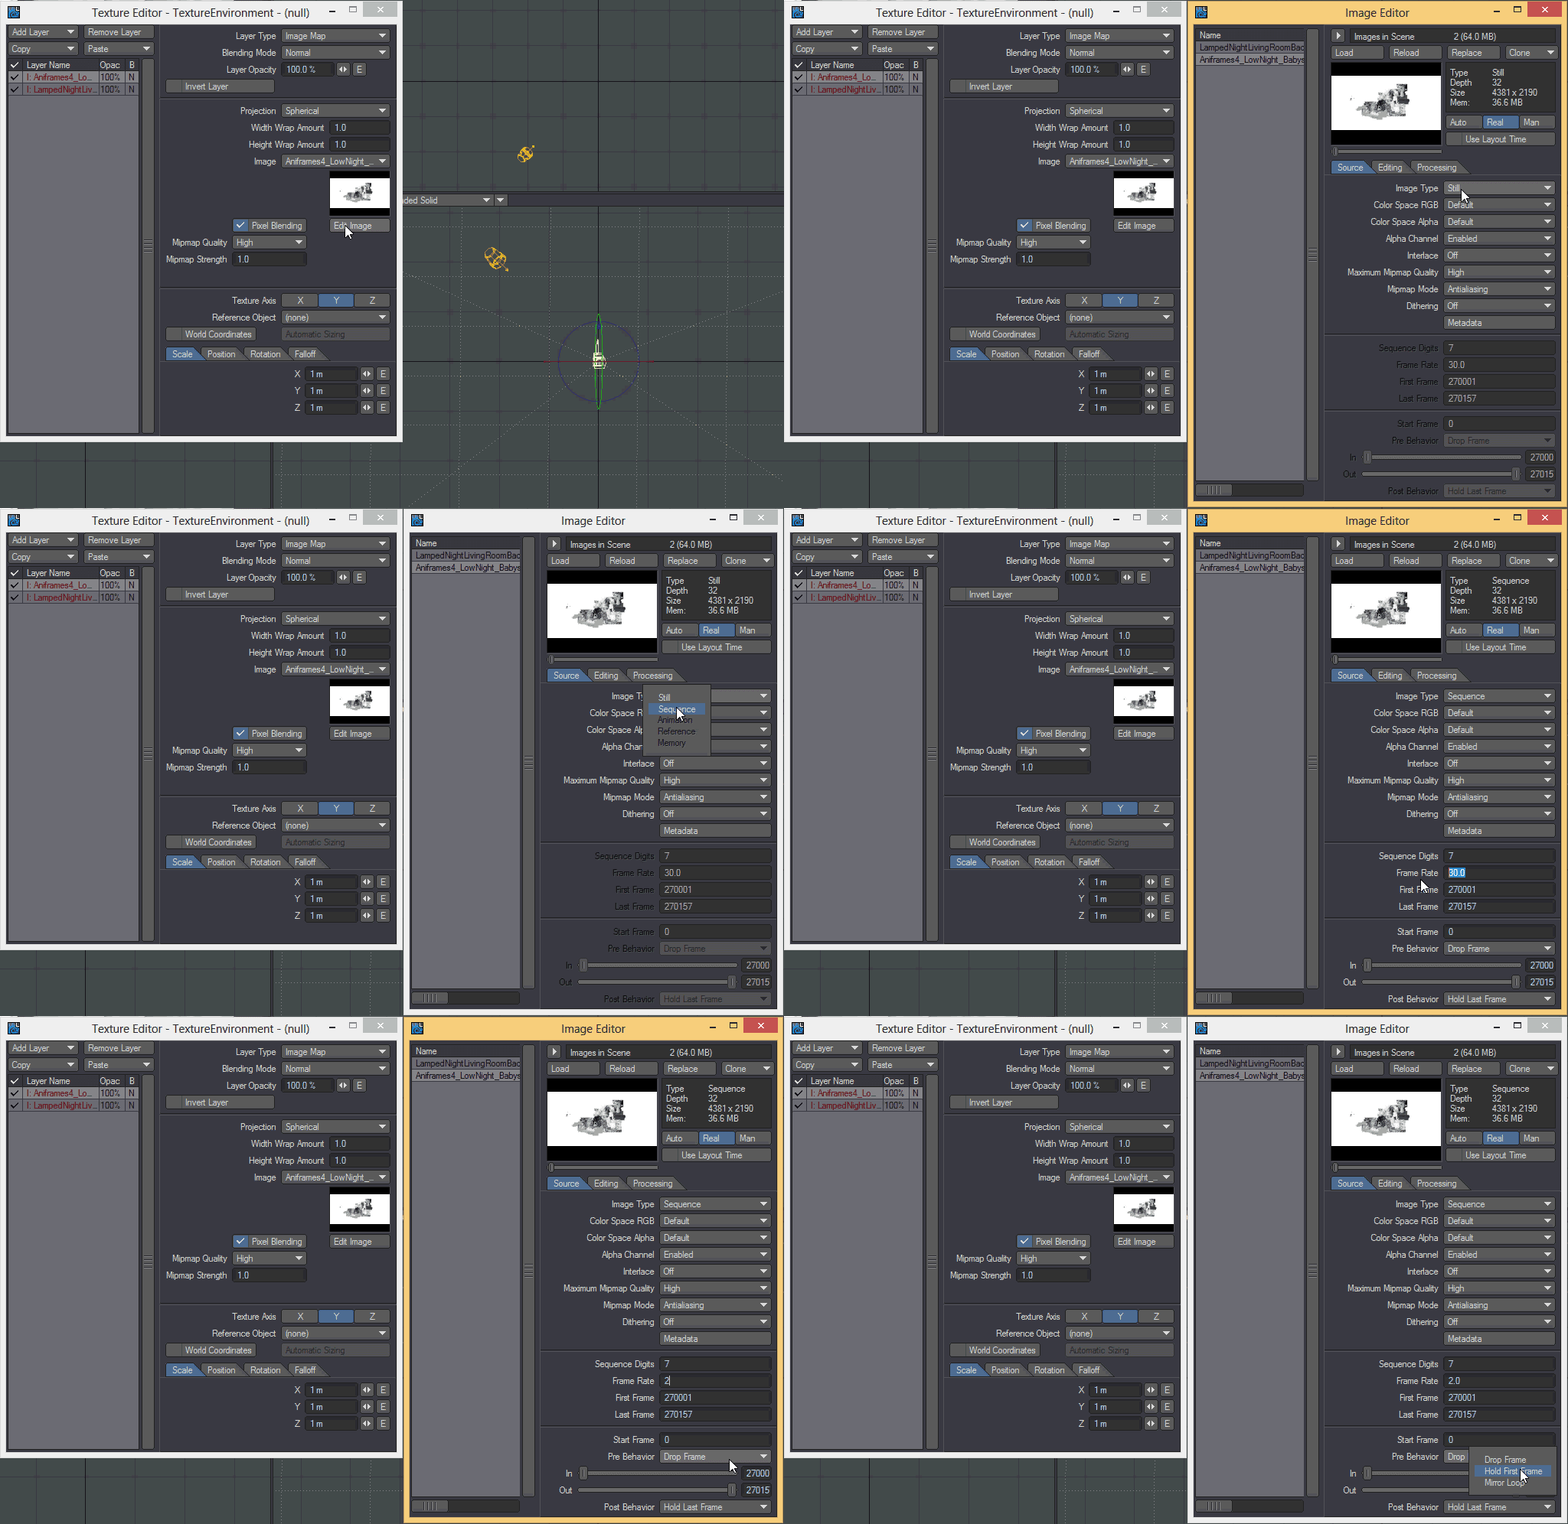
This pulls up the effects window’s Backdrop tab. Select Add Environment>>Textured Environment. Then doubleclick on the new Textured Environment listed below or rightclick and select its properties. Change the axis of the environment to Y and then select Texture.
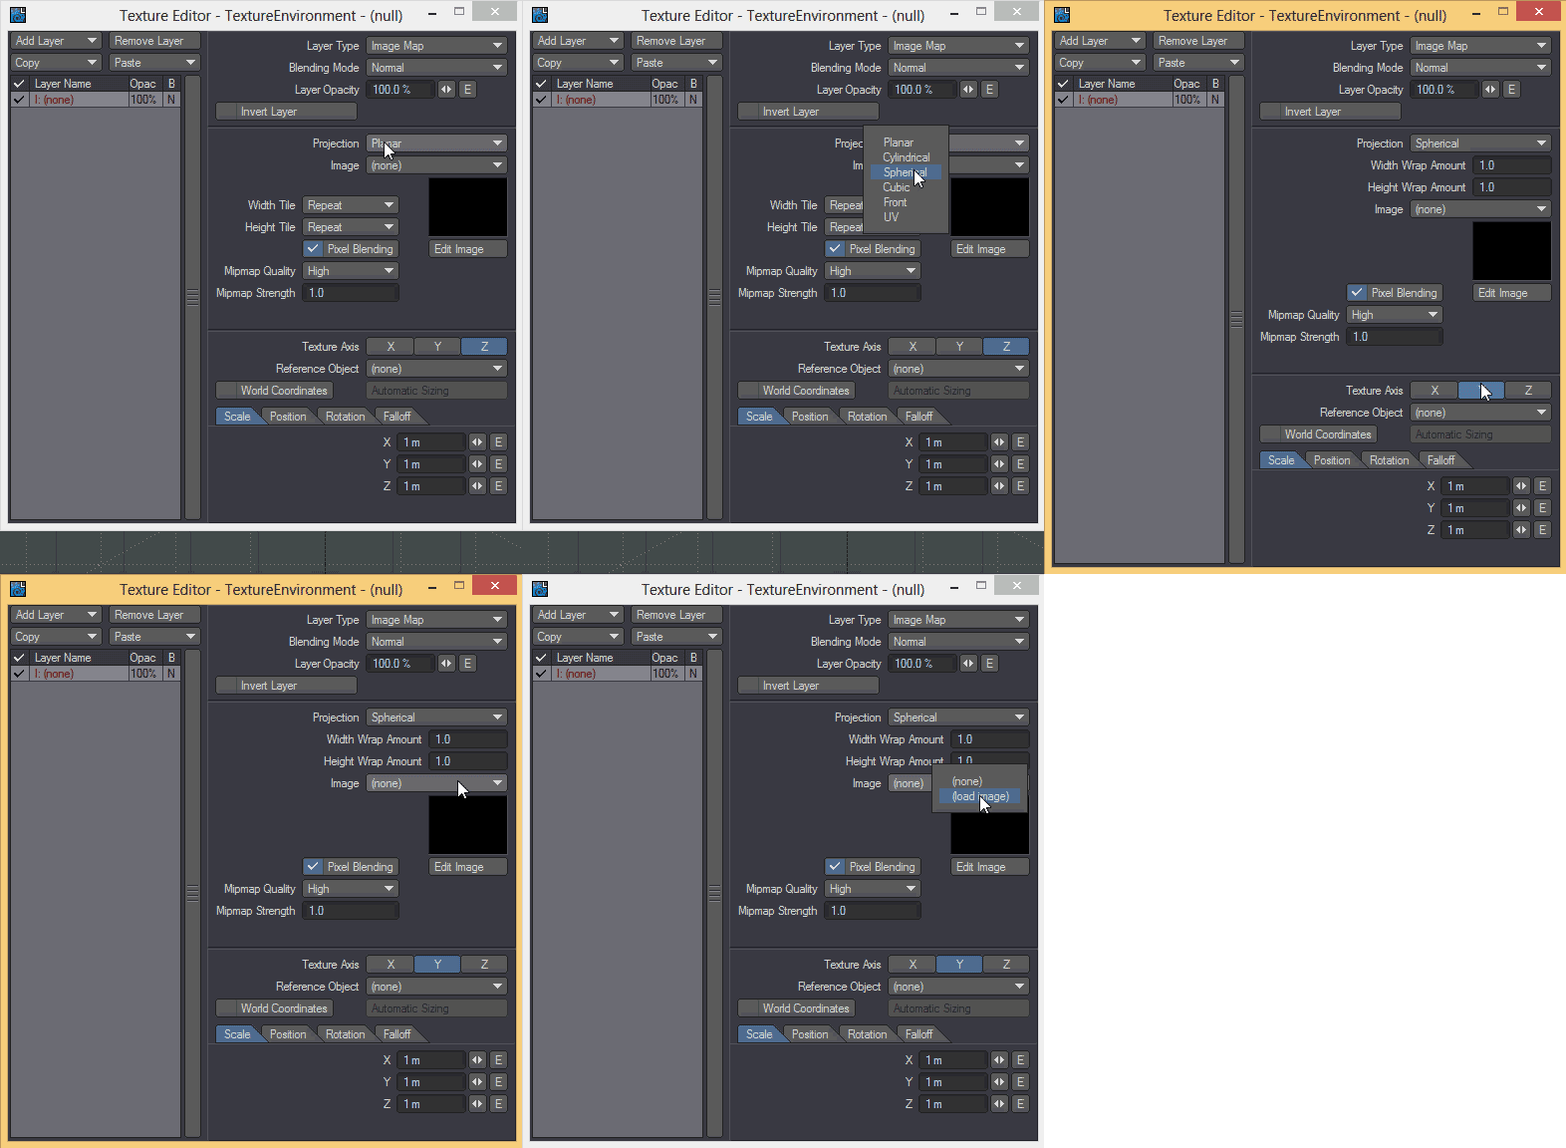
This pulled up the Texture Editor for this Texture Environment. go to Projection>>Spherical. set the Texture Axis to Y and then go to Image>>(load image).
A File Open dialogue box opens and you can
select your image. Please note that, should you choose, you can load
image layers via the left column’s Add Layer function. This would be useful for loading alpha matted PNG character animations over a background, for example.
If your image is part of a sequence or you loaded a video, the settings
need to be changed or verified. Images load by default as stills, and
LightWave must be told otherwise. Click Edit Image
This pulls up the Image Editor window. If you loaded a video the image type should automatically be listed as Animation, but if you loaded an image that is in fact a sequence, go to ImageType>>Sequence.
Now the previously greyed-out frame information can be altered. Make
sure your frame rate matches your asset’s export settings unless you
want to change the speed.
The Start Frame entry box asks for how many
frames (according to your asset’s frame rate you just changed, not your
LightWave scene’s frame rate) to wait until beginning the animation from
the start. If your sequence should hang around before beginning rather
than popping in when it’s start frame says so, go to PreBehavior>>HoldFirstFrame instead of it’s default DropFrame option. The Post Behavior follows similar logic.
